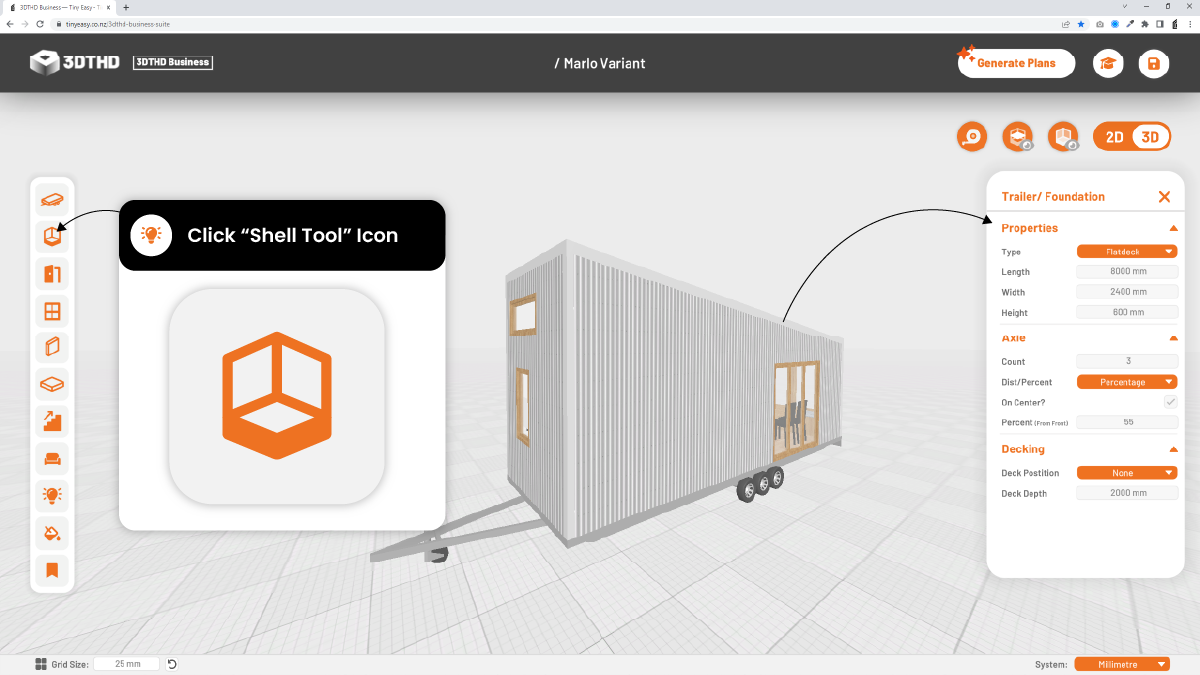
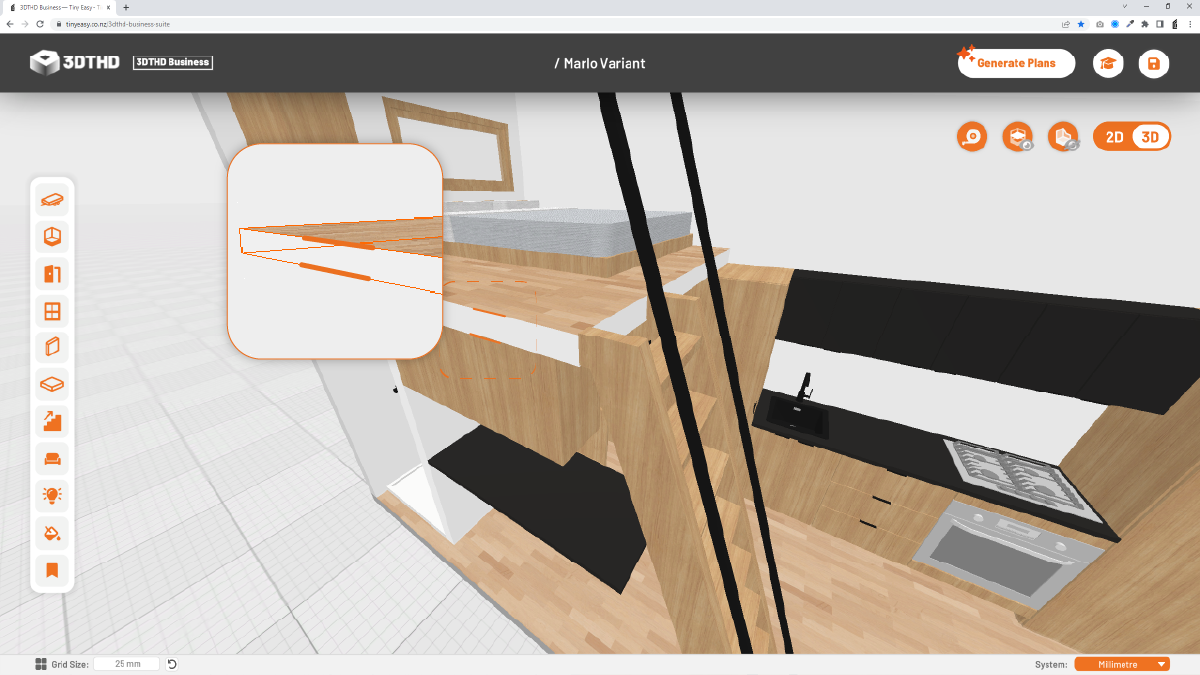
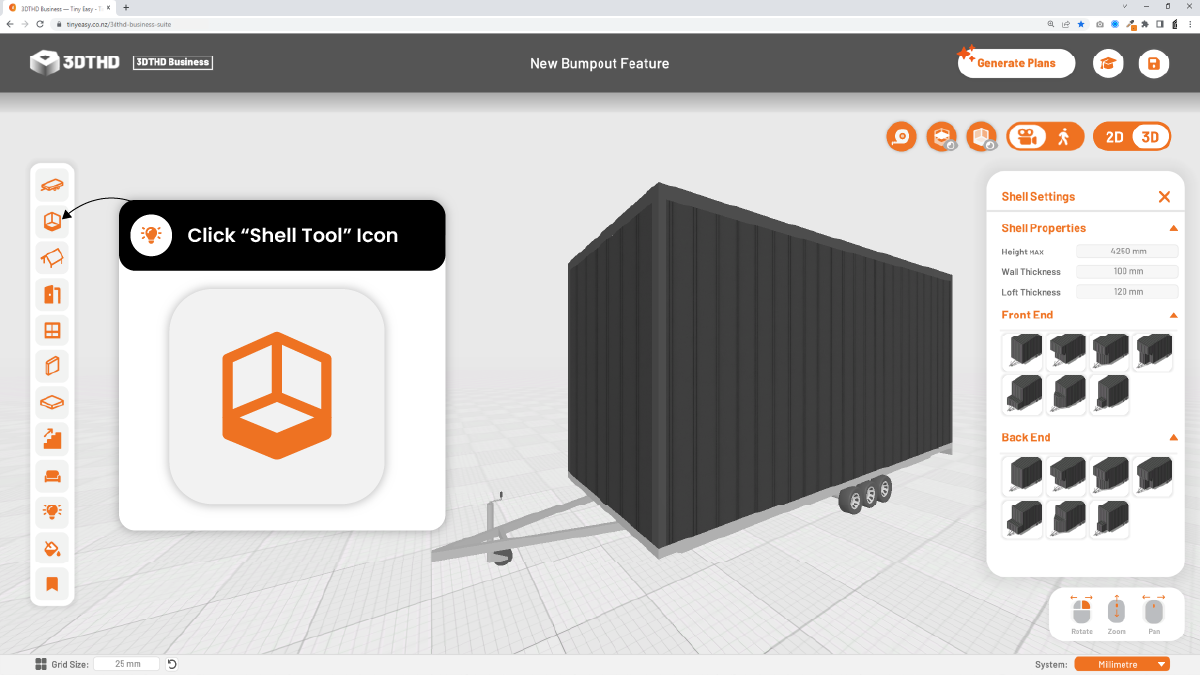
Shell Tool
The Shell Tool allows you to adjust the dimensions of the exterior of the tiny house, the roof, and the shape of how you want your tiny house to look like, whether you want to have a bumpout or an overhang.
Shell Properties
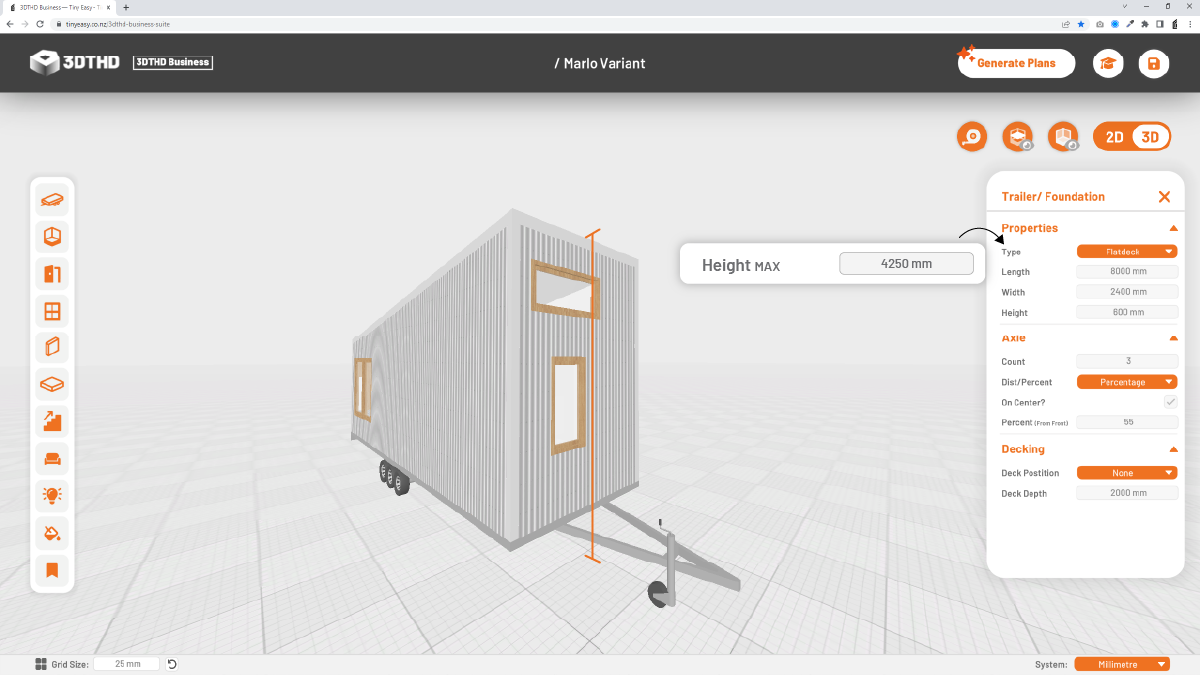
Height Max
This tool defines the MAX height of your shell including your Trailer. This means that the height of the tiny house build-up is
Total Max Height - Trailer Height.
This is useful for sticking to the maximum height regulations for tiny homes in your area.
For example, the max legal road height is 4.27m in New Zealand. So we recommend including a buffer in your tiny house height to allow for additional roof build-up like, roofing that sticks out more than you expect to stay within your regulations.
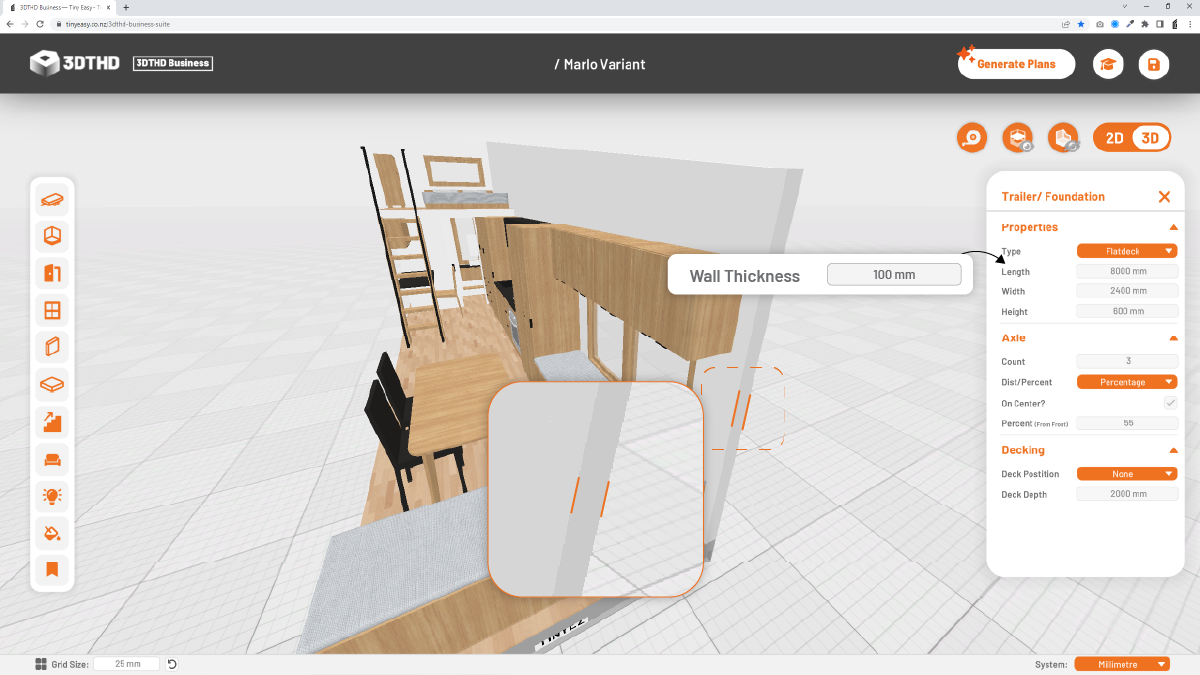
Wall Thickness
Set the exterior wall thickness to the thickness of your frame build-up + the interior lining thickness. The exterior cladding is not added to this as it hangs over to the outside of the trailer. E.g. if you have 90mm/4” steel framing and a 10mm/ ¾” interior lining, your Wall Thickness should be 100mm / 4” 3/4.
Loft Thickness
This defines the thickness of lofts & overhangs of shells, if you have enabled this option.
🌟NEW🌟Bump Out Feature
14/04/23
Bump-outs are a popular feature in tiny house design that add extra square footage to the interior space of the home. By extending a portion of the trailer beyond the traditional rectangular footprint, bump-outs provide additional room for features such as a shower nook, extra storage, or even a small outdoor shed.
With that being said, I am thrilled to present the newest feature of our 3D Tiny House Designer: Bump-outs! Our team has been hard at work perfecting this innovative feature, and I can't wait to demonstrate how it can enhance your tiny house design.
So let's dive in!
🏠Updated Shell Menu
You may already be familiar on how the shell menu works and the different settings available for customization. The biggest difference you will find is the ability to apply different shapes and style overhangs to the front and back end of your tiny house shell.
We've added these new settings below the Shell Properties settings.
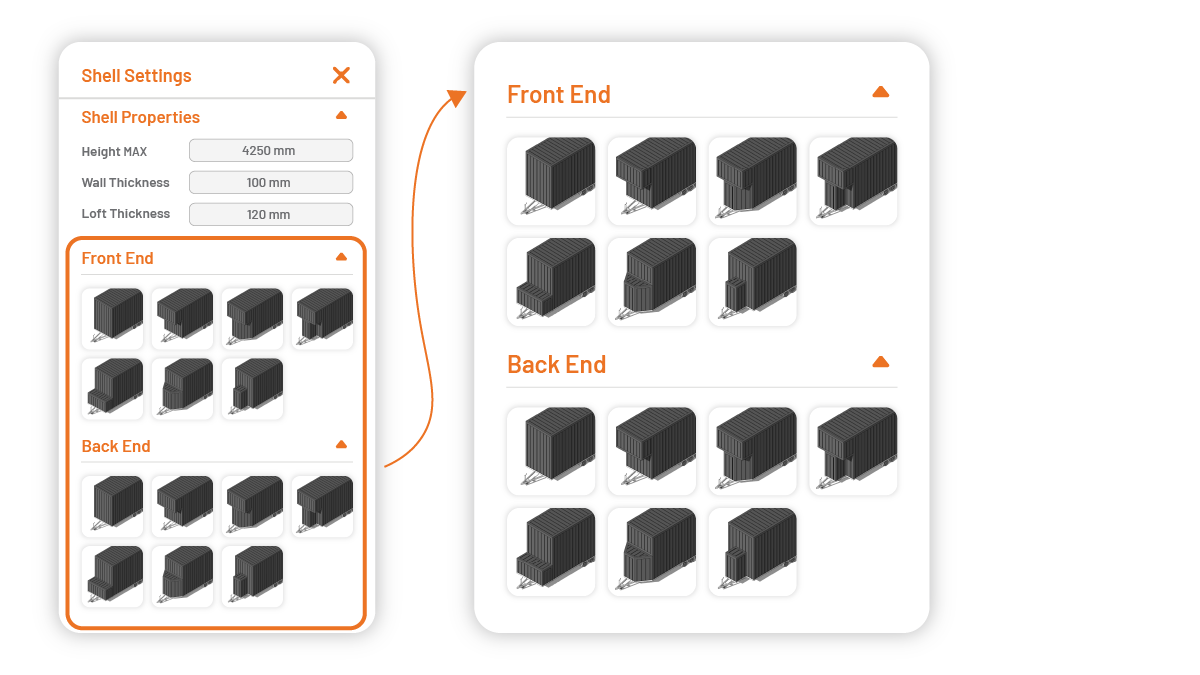
The two new sections are in the shell menu featuring Front End settings & Back End settings. To make adjusting the shell as easy as possible for you, we've added pre-set buttons of the different bump-out styles to the Front and Back end of your tiny house shell.
🎨⚙️ Bump-out Styles & Settings
Here are the different styles you can choose from both the Front & Back End:
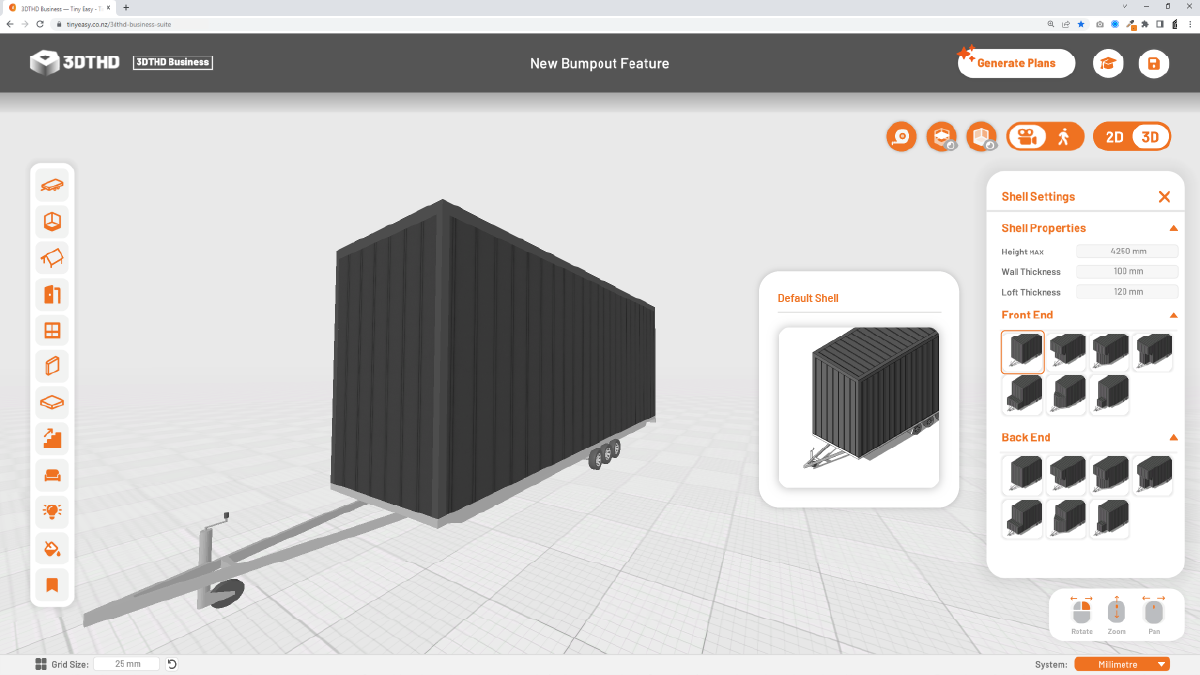
Default
The first button in the menu is your standard rectangular shell: default. You can select this if you want to revert back to the initial style.
As this style is your standard rectangular shell type: default, no extra settings will appear for this style. Instead you can adjust the settings in the first section of the menu "Shell Properties".
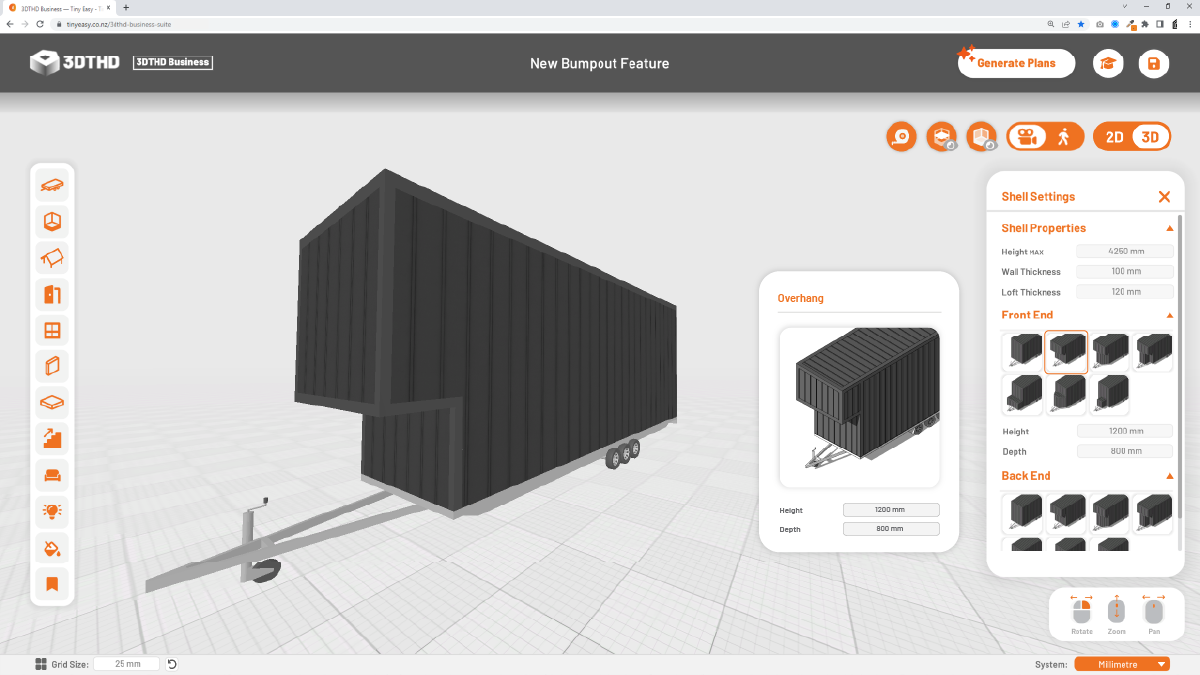
Overhang
The second button in the menu is your standard cantilevered bump out typically located at loft height.
The extra settings that you can adjust, are the height and depth. These settings will appear once you have selected the style.
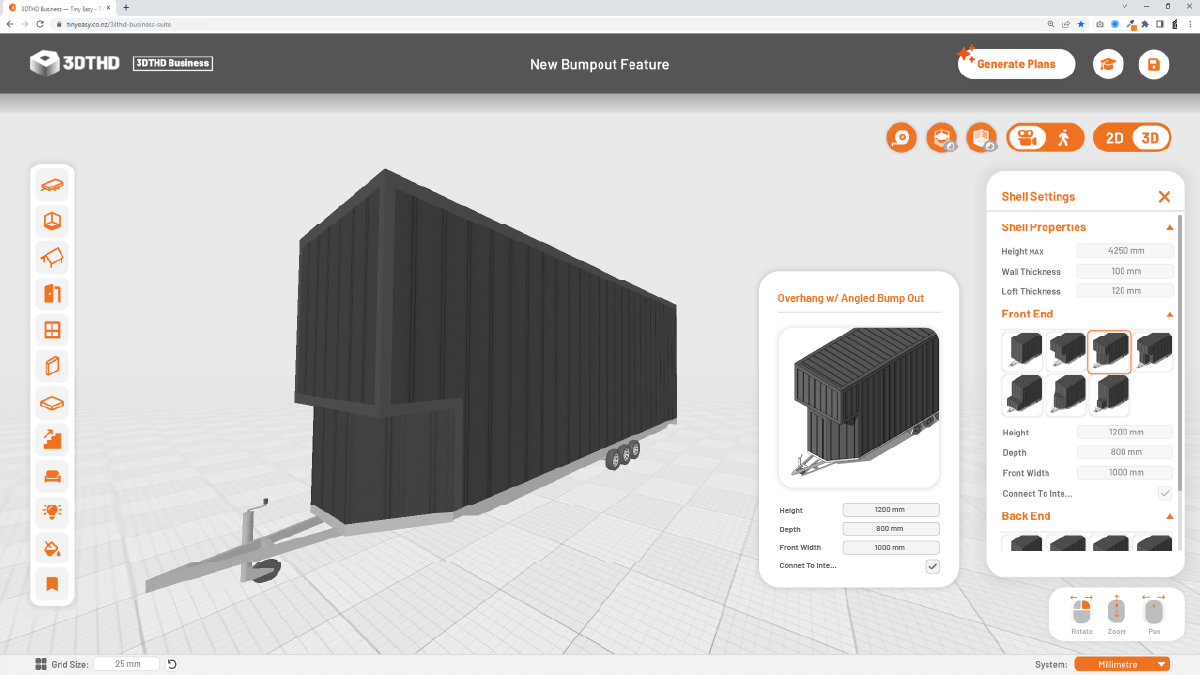
Overhang with Angled Bump Out
The third button in the menu is an overhang with an angled bump out creating an extension to the ground floor of the tiny home. Typically used to extend the interior like the kitchen.
With this style, you can adjust the height and depth, but you can also adjust the Front Width which will adjust the angle of the Bump out. To keep the front symmetrical, simply input the desired with of the angled front end, and the two attaching angled walls will generate automatically.
You can also choose to connect this bump out with the interior, which will give you option to extend the internal space, or to keep the bump out separate from the interior.
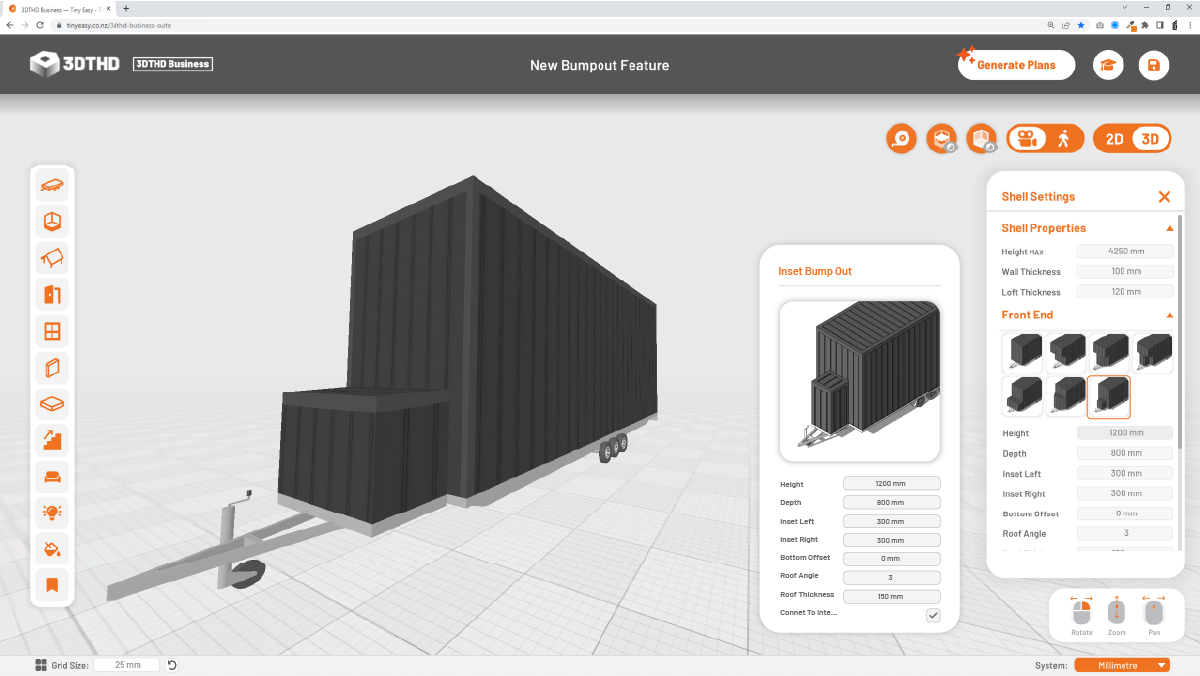
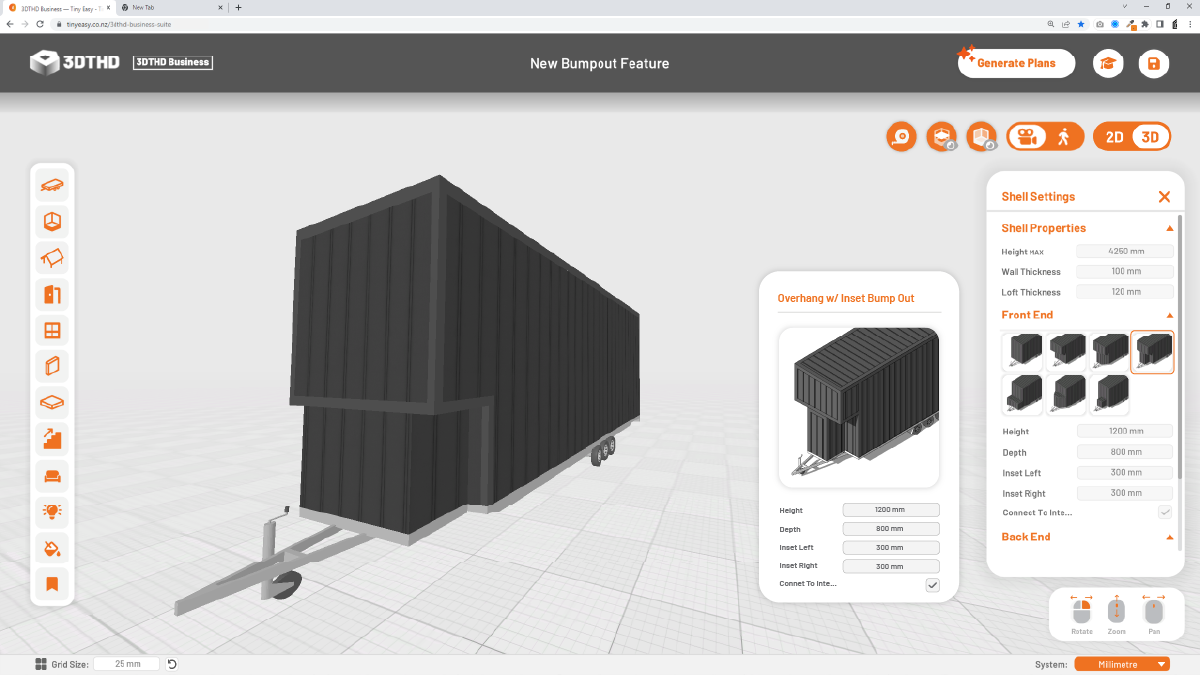
Overhang with Inset Bump Out
The fourth button in the menu is an overhang with an inset bump out creating an extension to the ground floor of the tiny home. Typically used as extra storage space, or nook to the interior, but can also be used as external storage space like a shed.
The standard settings of height and depth are available, however for this style, you can also adjust the Inset Left & Right of the bump out, so if you only want one side to be inset to make way for a water heater for example, you can do just this! You can also choose to connect this bump out with the interior.
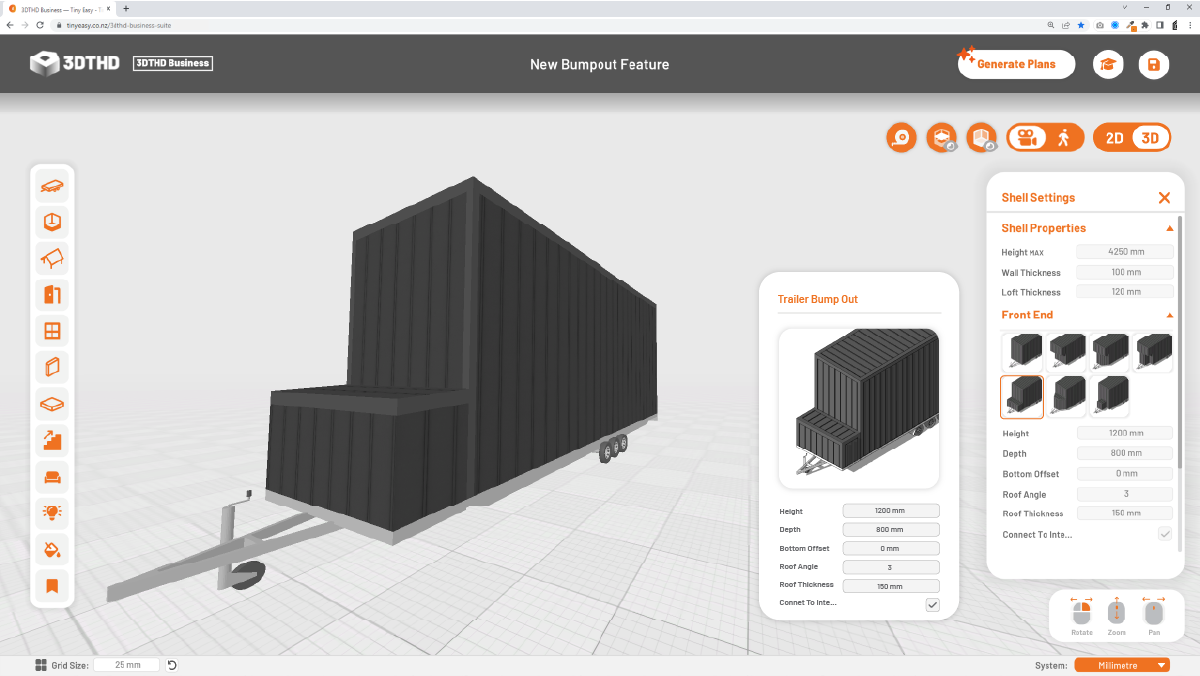
Trailer Bump Out
The fifth button in the menu is a bump out on the base of the trailer. Typically used as extra external storage accessed from the exterior.
This style offers a some extra settings, with the standard settings of height and depth, you can also adjust the Bottom Offset which will allow you to elevate the bottom of the bump out. You can also adjust the Roof Angle, Roof Thickness and choose to connect the bump out to the interior.
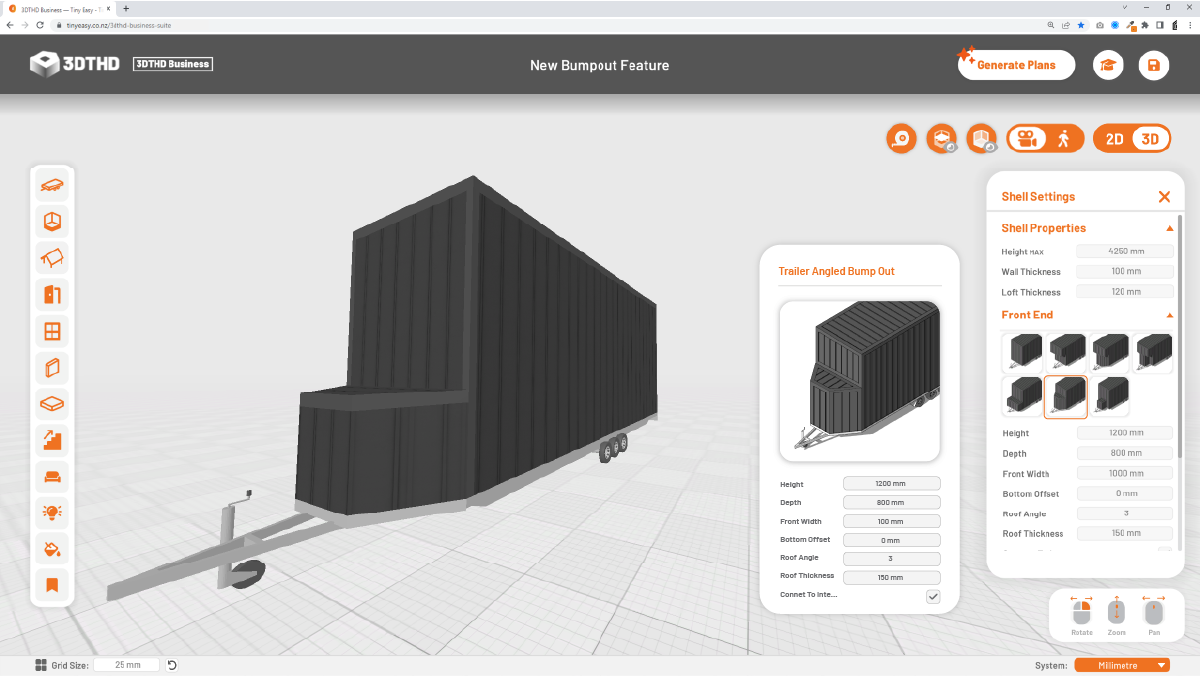
Trailer Angled Bump Out
The sixth button in the menu is an angled bump out on the base of the trailer. Typically used as extra external storage accessed from the exterior.
For this style, the same settings apply from Overhang with Angled Bump Out, however as this style isn't accompanied with an overhang, you can also adjust the Roof Angle & Thickness and choose to connect the bump out to the interior.
Inset Bump Out
The last button in the menu is an inset bump out on the base of the trailer. Can be used as both an internal and external extension to the shell.
The same settings apply as above for the Inset Bump Out